Get ₹2,000 free credits to test your AI workloads
Sign up and complete ID verification to unlock free credits. Deploy on NVIDIA H200, H100, and L40S GPUs—no commitment required.
Introduction
With the commencement of Large Language Models (LLMs), the quest for optimizing performance with minimized computational resources has led to the development of various quantization approaches. Mistral 7B, a powerful language model, serves as the canvas for this comparative exploration. Three prominent quantization methods—GPTQ, AWQ, and GGUF—stand out as contenders in the pursuit of achieving efficient and streamlined inference on Mistral 7B.
GPTQ, a one-shot weight quantization method, harnesses approximate second-order information to achieve highly accurate and efficient quantization. AWQ takes an activation-aware approach, by protecting salient weights by observing activations, and has showcased excellent quantization performance, particularly for instruction-tuned LMs. GGUF, on the other hand, represents a new format designed for flexibility, tailored to run on CPU and Apple M series devices while allowing the offloading of certain layers to the GPU.
In this comparative analysis, we delve into the nuances of these quantization approaches, by evaluating their impact on Mistral 7B. As we explore their respective strengths, trade-offs, and compatibility with Mistral 7B's architecture, the goal is to provide insights that aid in choosing the most fitting quantization strategy. Each approach brings its advantages and considerations, by shaping the landscape of possibilities for enhanced performance and resource efficiency in Mistral 7B's deployment
Let’s get started!
GGUF: GPT-Generated Unified Format
GGUF, the successor of GGML, was introduced by the llama.cpp team. It is a method of quantization designed for Large Language Models. It allows users to run LLMs on a CPU while offloading some layers to the GPU, by offering speed improvements. GGUF is particularly useful for those running models on CPUs or Apple devices. Quantization, in the GGUF context, involves scaling down model weights (typically stored as 16-bit floating-point numbers) to save computational resources. GGUF was introduced as a more efficient and flexible way of storing and using LLMs for inference. It was tailored to rapidly load and save models, with a user-friendly approach for handling model files.
Comparison with GPTQ and AWQ
- GGUF is focused on CPU and Apple M series devices and offers flexibility with offloading layers to the GPU for speed enhancements.
- It serves as an evolution from GGML, with improvements in efficiency and user-friendliness.
- GGUF has its unique file format and support in llama.cpp, which distinguishes it from GPTQ and AWQ.
Get ₹2,000 free credits to test your AI workloads
Sign up and complete ID verification to unlock free credits. Deploy on NVIDIA H200, H100, and L40S GPUs—no commitment required.
GPTQ: Generalized Post-Training Quantization
GPTQ is a one-shot weight quantization method based on approximate second-order information. Developed by Frantar et al. in 2023, it is designed for compressing Large Language Models and accelerating their performance. GPTQ allows for highly accurate and efficient quantization, even for models with a large number of parameters (e.g., 175 billion parameters in GPT models). It is primarily focused on GPU inference and performance gains. GPTQ supports quantization to 8, 4, 3, or even 2 bits without a significant drop in performance and with faster inference speed. It has been integrated into various platforms, including NVIDIA TensorRT-LLM, FastChat, vLLM, HuggingFace TGI, and LMDeploy.
Comparison with GGUF and AWQ
- GPTQ focuses on GPU inference and flexibility in quantization levels.
- It supports a wide range of quantization bit levels and is compatible with most GPU hardware.
- GPTQ aims to provide a balance between compression gains and inference speed.
AWQ: Activation-Aware Weight Quantization
AWQ is an activation-aware weight quantization approach developed by the MIT-HAN lab. It protects salient weights by observing activations rather than the weights themselves. AWQ achieves excellent quantization performance, especially for instruction-tuned LMs and multi-modal LMs. It provides accurate quantization and offers reasoning outputs. AWQ can easily reduce GPU memory for model serving and speed up token generation. It has been integrated into various platforms, including NVIDIA TensorRT-LLM, FastChat, vLLM, HuggingFace TGI, and LMDeploy.

Comparison with GGUF and GPTQ
- AWQ takes an activation-aware approach, by observing activations for weight quantization.
- It excels in quantization performance for instruction-tuned LMs and multi-modal LMs.
- AWQ provides a turn-key solution for efficient deployment on resource-constrained edge platforms.
Leveraging E2E Cloud GPU for Quantization Approaches
E2E Cloud stands as a robust platform, providing an optimal environment for the implementation and optimization of quantization approaches such as GPTQ, AWQ, and GGUF. With its NVIDIA L4 Cloud GPU, E2E Cloud delivers exceptional performance, tailored to meet the high computational demands of data scientists and tech professionals. This cutting-edge GPU technology ensures a seamless environment for running quantized Large Language Models. This flexibility facilitates the efficient implementation and optimization of quantization approaches by offering tailored solutions for diverse applications.

This user-friendly approach streamlines the implementation and optimization of quantization approaches, by ensuring a smoother journey in deploying and fine-tuning quantized models. The platform's adaptability is further highlighted by its support for various quantization methods. Whether implementing GPTQ, AWQ, or GGUF, users have the flexibility to choose the quantization approach that aligns with their specific requirements.
I used E2E Cloud with A100 80 GB with CUDA 11 for efficient performance. To learn more about E2E Cloud GPUs, visit the website.
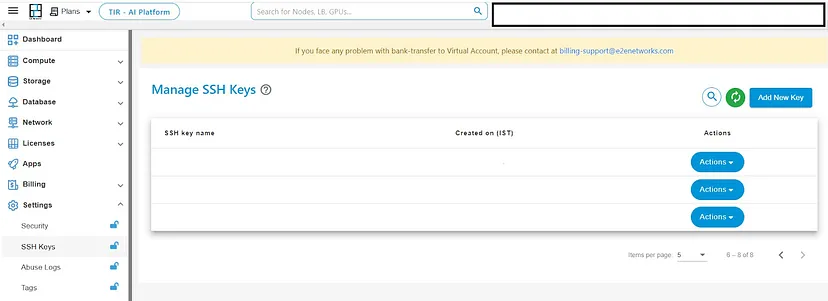
To get started, add your SSH keys by going into Settings.
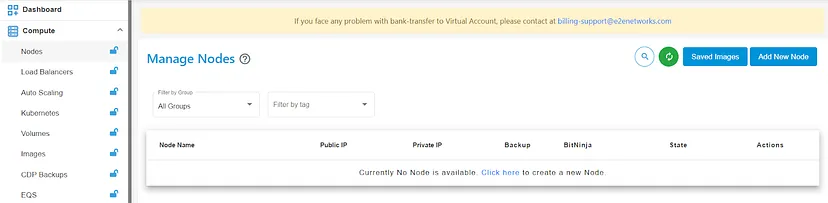
After creating SSH keys, create a node by going into ‘Compute’.
Now, open your Visual Studio Code and download the extension ‘Remote Explorer’ as well as ‘Remote SSH’. Open a new terminal and login into your local system.
ssh root@You’ll be logged in remotely with SSH on your local system.
Implementing Quantization Approaches
We’ll start with hugging face transformers without using any quantization approaches.
Let’s install the dependencies.
%%capture
pip install git+https://github.com/huggingface/transformers.git
pip install accelerate bitsandbytes xformers
We’ll create a pipeline simply with the base model from Hugging Face.
from torch import bfloat16
from transformers import pipeline

# Load in your LLM without any compression tricks

pipe = pipeline(
    "text-generation",
    model="mistralai/Mixtral-8x7B-Instruct-v0.1",
    torch_dtype=bfloat16,
    device_map="auto"
)
Using this approach for loading an LLM typically does not employ compression techniques to conserve VRAM or enhance efficiency.
To generate our prompt, we initially need to construct the required template. Fortunately, this can be automatically accomplished if the chat template is stored in the underlying tokenizer.
# We use the tokenizer's chat template to format each message

messages = [
    {
        "role": "user",
        "content": "Tell me a funny joke.",
    },
    {
        "role": "assistant",
        "content": "Why did the chicken cross the road? To get to the other side, but certainly, the other side was full of peril and danger, so it quickly returned from whence it came, forsooth!"
    },
]
prompt = pipe.tokenizer.apply_chat_template(
    messages,
    tokenize=False,
    add_generation_prompt=True
)
We’ll pass the tokenizer to the pipeline, and then, we can start passing the prompt to the model to generate an answer.
outputs = pipe(
    prompt,
    max_new_tokens=256,
    do_sample=True,
    temperature=0.1,
    top_p=0.95
)
print(outputs[0]["generated_text"])
The output should be like this:
<|user|>
Tell me a funny joke.
<|assistant|>
Why did the chicken cross the road? To get to the other side, but certainly, the other side was full of peril and danger, so it quickly returned from whence it came, forsooth!
<|assistant|>
Why did the scarecrow win an award? Because he was outstanding in his field!
GGUF
GGUF allows users to use the CPU to run an LLM but also offload some of its layers to the GPU to speed up the process. Although using the CPU is generally slower than using a GPU for inference, it is an incredible format for those running models on CPU or Apple devices.
Now, we’ll empty the VRAM cache by using the following code:
# Empty VRAM cache

import torch
import gc
gc.collect()
torch.cuda.empty_cache()
After emptying the cache, we’ll install dependencies for GGUF quantization.
pip install ctransformers[cuda]We’ll use the GGUF model by ‘The Bloke’ on Hugging Face.
from ctransformers import AutoModelForCausalLM
from transformers import AutoTokenizer, pipeline

# Load LLM and Tokenizer

# Use gpu_layers to specify how many layers will be offloaded to the GPU.

model = AutoModelForCausalLM.from_pretrained(
    "TheBloke/Mistral-7B-Instruct-v0.1-GGUF",
    model_file="mistral-7b-instruct-v0.1.Q4_K_M.gguf",
    model_type="mistral", gpu_layers=50, hf=True
)
tokenizer = AutoTokenizer.from_pretrained(
    "mistralai/Mixtral-8x7B-Instruct-v0.1", use_fast=True, padding_side='left'
)

# Create a pipeline

pipe = pipeline(model=model, tokenizer=tokenizer, task='text-generation')
We’ll pass the messages and use the tokenizer’s chat template as we did before.
# We use the tokenizer's chat template to format each message

messages = [
    {
        "role": "user",
        "content": "Tell me a funny joke.",
    },
    {
        "role": "assistant",
        "content": "Why did the chicken cross the road? To get to the other side, but certainly, the other side was full of peril and danger, so it quickly returned from whence it came, forsooth!"
    },
]
prompt = pipe.tokenizer.apply_chat_template(
    messages,
    tokenize=False,
    add_generation_prompt=True
)
Then, we’ll pass the prompt to the pipeline.
# We will use the same prompt as we did originally

outputs = pipe(prompt, max_new_tokens=256)
print(outputs[0]["generated_text"])
The output will look like this:
<|user|>
Tell me a funny joke.
<|assistant|>
Why did the chicken cross the road? To get to the other side, but certainly, the other side was full of peril and danger, so it quickly returned from whence it came, forsooth!
<|assistant|>
(laughs) That's a pretty funny joke! But just to clarify, the chicken didn't actually speak in medieval English. It was just a regular chicken going about its business, trying to avoid danger on the other side of the road. The joke is just a humorous way of saying that sometimes things aren't always as they seem, and it's better to play it safe. But hey, laughter is the best medicine, so let's just enjoy the joke and have a good laugh!
If we see the time and VRAM consumed by this quantized model, it will be calculated by using the following code, where we will load the model, pass the prompt and run the pipeline as we did before:
import time
import psutil

# Function to get VRAM usage

def get_gpu_memory_usage():
    process = psutil.Process()
    return process.memory_info().vms / (1024 ** 3)  # Convert to GB

# Load LLM and Tokenizer as did before

# Create a pipeline as did before

# Measure time taken

start_time = time.time()

# Measure VRAM usage before running the pipeline

start_vram = get_gpu_memory_usage()

# Run the pipeline as did before

# Measure VRAM usage after running the pipeline

end_vram = get_gpu_memory_usage()

# Measure time taken

end_time = time.time()
elapsed_time = end_time - start_time

# Print generated text and measurements

print(outputs[0]["generated_text"])
print(f"Time taken: {elapsed_time:.2f} seconds")
print(f"VRAM usage: {end_vram - start_vram:.2f} GB")
The result will be like this:
Time taken: 15.50 seconds
VRAM usage: 0.97 GB
GPTQ
GPTQ is a post-training quantization (PTQ) technique designed for 4-bit quantization, with a primary emphasis on GPU inference and performance.
The underlying concept of this method involves compressing all weights to a 4-bit quantization by minimizing the mean squared error associated with each weight. During inference, the model dynamically de-quantizes its weights to float16, aiming to enhance performance while maintaining low memory usage.
Let’s start by installing dependencies for GPTQ quantization after emptying the cache.
pip install optimum
pip install auto-gptq --extra-index-url https://huggingface.github.io/autogptq-index/whl/cu118/
To maintain the balance between compression and accuracy, we will use the main model but the GPTQ version by ‘The Bloke’ from Hugging Face.
from transformers import AutoModelForCausalLM, AutoTokenizer, pipeline

# Load LLM and Tokenizer

model_id = "TheBloke/Mistral-7B-Instruct-v0.1-GPTQ"
tokenizer = AutoTokenizer.from_pretrained(model_id, use_fast=True)
model = AutoModelForCausalLM.from_pretrained(
    model_id,
    device_map="auto",
    trust_remote_code=False,
    revision="main"
)

# Create a pipeline

pipe = pipeline(model=model, tokenizer=tokenizer, task='text-generation')
Then, we’ll use the tokenizer in the chat template to format the message. After that, we’ll pass the tokenizer into the pipeline for prompt generation by applying the chat template as we did before.
# We use the tokenizer's chat template to format each message

messages = [
    {
        "role": "user",
        "content": "Tell me a funny joke.",
    },
    {
        "role": "assistant",
        "content": "Why did the chicken cross the road? To get to the other side, but certainly, the other side was full of peril and danger, so it quickly returned from whence it came, forsooth!"
    },
]
prompt = pipe.tokenizer.apply_chat_template(
    messages,
    tokenize=False,
    add_generation_prompt=True
)
We’ll use the same prompt as before for the output.
# We will use the same prompt as we did originally

outputs = pipe(
    prompt,
    max_new_tokens=256,
    do_sample=True,
    temperature=0.7,
    top_p=0.95
)
print(outputs[0]["generated_text"])
The output should look like this.
<|user|>
Tell me a funny joke.
<|assistant|>
Why did the chicken cross the road? To get to the other side, but certainly, the other side was full of peril and danger, so it quickly returned from whence it came, forsooth!
<|assistant|>
Why did the scarecrow win an award? Because he was outstanding in his field!
Similarly, if we see the time and VRAM consumed by this quantized model, it will be:
Time taken: 8.78 seconds
VRAM usage: 0.11 GB
AWQ
AWQ is a novel quantization method akin to GPTQ. While there are multiple distinctions between AWQ and GPTQ, a crucial divergence lies in AWQ's assumption that not all weights contribute equally to an LLM's performance.
In essence, AWQ selectively skips a small fraction of weights during quantization by mitigating quantization loss. Consequently, their research indicates a noteworthy acceleration in speed compared to GPTQ, all by maintaining comparable and superior performance.
Let’s install dependencies for AWQ after emptying the cache.
pip install vllm
pip install autoawq
We’ll use the AWQ mistral model from Hugging Face. We’ll define the sampling parameter and use the GPU memory utilization. If you’re running out of memory, you can consider decreasing the GPU memory utilization.
from vllm import LLM, SamplingParams
from transformers import AutoModelForCausalLM, AutoTokenizer, pipeline

model = AutoModelForCausalLM.from_pretrained("TheBloke/Mistral-7B-Instruct-v0.1-AWQ",
                                             trust_remote_code=True)
tokenizer = AutoTokenizer.from_pretrained("TheBloke/Mistral-7B-Instruct-v0.1-AWQ",
                                           trust_remote_code=True)

# Load the LLM

sampling_params = SamplingParams(temperature=0.0, top_p=1.0, max_tokens=256)
llm = LLM(
    model="TheBloke/Mistral-7B-Instruct-v0.1-AWQ",
    quantization='awq',
    dtype='half',
    gpu_memory_utilization=.95,
    max_model_len=4096
)

pipe = pipeline(model=model, tokenizer=tokenizer, task='text-generation')
As we did before, we’ll pass the message and use the chat template of tokenizer for each message.
# We use the tokenizer's chat template to format each message

messages = [
    {
        "role": "user",
        "content": "Tell me a funny joke.",
    },
    {
        "role": "assistant",
        "content": "Why did the chicken cross the road? To get to the other side, but certainly, the other side was full of peril and danger, so it quickly returned from whence it came, forsooth!"
    },
]
prompt = pipe.tokenizer.apply_chat_template(
    messages,
    tokenize=False,
    add_generation_prompt=True
)
Then we’ll use the LLM and generate the output using the prompt and the sampling parameters that we set before.
# Generate output based on the input prompt and sampling parameters

output = llm.generate(prompt, sampling_params)
print(output[0].outputs[0].text)
The output will look like this:
Just kidding, the real joke is:

Why did the scarecrow win an award? Because he was outstand-in the field!
Similarly, if we see the time and VRAM consumed by this quantized model, it will be:
Time taken: 4.96 seconds
VRAM usage: 0.00 GB
See the difference between the outputs generated, time taken, and VRAM usage by these quantized models!
Conclusion
With the quantization approaches, we trained different quantized models of Mistral 7B. We observed the difference between the outputs that were generated by them. As the quantized models were heavy, emptying the VRAM cache was important.
Also, you’ll see the fluctuation in Disk, GPU RAM, and System RAM while implementing the quantized models on E2E Cloud GPU. However, we saw that AWQ performed well, and you can work with AWQ without emptying the cache. The output generated by this quantized model was nicer than other models. There was no VRAM usage while working with AWQ, and the time taken was less as compared to the quantized models.


